Wednesday, December 1, 2010

November Daring Baker's Challenge: Crostata


The 2010 November Daring Bakers’ challenge was hosted by Simona of briciole. She chose to challenge Daring Bakers’ to make pasta frolla for a crostata. She used her own experience as a source, as well as information from Pellegrino Artusi’s Science in the Kitchen and the Art of Eating Well.

For this challenge I wanted to celebrate the last bit of fall that's been hanging on here in Boston so I decided to make version 1 of the pasta frolla, fill it with vanilla pastry cream and top it off with caramelized apples.

All-in-all this was really easy to make and tasted delicious!  I followed the pastry cream recipe provided by Simona and just added a bit of vanilla extract and although it was delicious I think it tasted much more like a custard than a cream with a very pronounced egg flavor which definitely reminded me of custard.

Pasta Frolla

Ingredients:
1/2 cup minus 1 tablespoon Powdered Sugar
1 3/4 cup Unbleached All-Purpose Flour
Pinch of Salt
8 tbsp Cold Unsalted Butter, cut into small pieces
Grated Zest of Half a Lemon 
1 large egg and 1 large egg yolk, lightly beaten in a small bowl

1) Whisk together sugar, flour and salt in a bowl.
2) Rub or cut the butter into the flour until the mixture has the consistency of coarse crumbs. You can do this in the bowl or on your work surface, using your fingertips or an implement of choice.
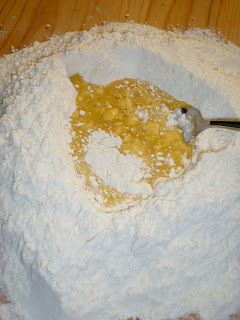
3) Make a well in the center of the mounded flour and butter mixture and pour the beaten eggs into it (reserve about a teaspoon of the egg mixture for glazing purposes later on – place in the refrigerator, covered, until ready to use).


4) Add the lemon zest to your flour/butter/egg mixture.
5) Use a fork to incorporate the liquid into the solid ingredients, and then use your fingertips.
6) Knead lightly just until the dough comes together into a ball.
7) Shape the dough into a flat disk and wrap in plastic wrap. Place the dough in the refrigerator and chill for at least two hours. You can refrigerate the dough overnight.


Pastry Cream

Ingredients: 
2 Extra-Large Eggs
1/3 cup Sugar
500 ml Milk (slightly more than 2 cups)
1 tsp Vanilla Extract
3 tbsp Pastry Flour

1) Pour the milk into a pan, add the vanilla extract and warm up to to well below boiling point.
2) In a mixing bowl, beat the eggs with the sugar until the mixture is bubbly.
3) Sift the flour over the egg mixture and beat briefly until it is incorporated.
4) Temper the egg mixture with a small quantity of milk, then slowly add the rest of the milk, mixing with a wooden spoon.
5) Pour the mixture into the pan and set it to very low heat, stirring at least every couple of minutes.


6) When the froth on the surface disappears completely, the crema starts to feel slightly thicker. From then on stir almost continuously.
7) When the crema reaches boiling temperature and thickens, cook briefly (1-2 minutes), then remove the pan from the heat, place the saucepan in a cold water bath and stir the crema to bring down its temperature.
8) While the crema cools down, stir it every now and then to prevent the formation of a film over it.

Assembling and Baking the Crostata con la Crema:

1) Heat the oven to 350ºF.
2) Take the pasta frolla out of the fridge, unwrap it and cut away ¼ of the dough. Reserve this dough to make the lattice top of the crostata. Refrigerate this dough while you work on the tart base.
3) To help roll the crostata dough, keep the dough on top of the plastic wrap that you had it wrapped in. This can help rolling the dough and can also help when transferring the dough to your pan. You can also use parchment paper for this. However, you can also roll the dough directly on a work surface if you prefer.
4) Lightly dust the top of the dough and your work surface (if you’re rolling directly on a work surface) with flour. Keep some flour handy to dust the dough as you go along.
5) If the dough is very firm, start by pressing the dough with the rolling pin from the middle to each end, moving the rolling pin by a pin's width each time; turn the dough 180 degrees and repeat; when it softens, start rolling.
6) Roll the dough into a circle about 1/8th inch (3 mm) thick.
7) If you used the plastic wrap or parchment paper as rolling surface, flip dough over the pan, centering it, and delicately press it all around so the corners are well covered. Peel away the plastic wrap.
8) Trim the excess dough hanging over the edges of the pan. Press the remaining dough around the border into the sides of the pan making sure the border is an even thickness all the way around.

 
9) Prick the bottom of the dough with a fork in several places.
10) Take out of the fridge the reserved pasta frolla you had cut away earlier. Roll it with your pin and cut into strips or use cookie cutters to make small shapes (this is not traditional, but it looks cute); or roll with your hands into ropes.
11) Cover the bottom of the crostata crust evenly with the pastry cream.
12) Brush the border and strips of dough with the reserved beaten eggs. You can add a drop or two of water to the beaten eggs if you don’t have enough liquid.

 
13) Put the tart in the oven and bake for 30 minutes (while the tart was baking I made the caramelized apples).
14) After 35 minutes, check the tart, and continue baking until the tart is of a nice golden hue.
14) When done, remove the tart from the oven and let cool. If you have used a tart pan with a removable bottom, then release the tart base from the fluted tart ring. Make sure the tart is completely cool before slicing and serving.


 Caramelized Apples:

Ingredients: 
3 tbsp Butter
5 spicy-sweet, crisp apples (Jonagold, Crispin, Honeycrisp), peeled and cut into 1/2-inch slices
1 tbsp plus 2 tbsp Granulated Sugar, Divided
1/2 tsp Ground Cinnamon
1/3 cup apple cider

1) Add the apples to the pan and sprinkle with 1 tablespoon sugar. Sauté the apples, stirring frequently, for 6-8 minutes, until they just start to turn tender. 


3) Sprinkle the apples with the remaining sugar and cinnamon. Toss the mixture gently and cook over medium heat for an additional 2 minutes, until the sugar begins to caramelize and the apples are crisp-tender.


4) Transfer the apples from the skillet to a serving bowl with a slotted spoon. Turn the heat to high and add the apple cider to the skillet, scraping up any browned bits. Reduce the heat slightly and allow the cider and the pan juices to simmer for 1-3 minutes, until the sauce has reduced and thickened slightly. 5) If you desire a thicker sauce, dissolve the cornstarch in a teaspoon of water, stir it into the sauce, and allow it to thicken for a moment. Pour the finished sauce over the warm apples and top crostata with them once cooled.
  
6) Slice, serve and enjoy :)


Monday, November 1, 2010

October Daring Bakers Challenge: Let's Go Nuts for Doughnuts!


The October 2010 Daring Bakers challenge was hosted by Lori of Butter Me Up. Lori chose to challenge DBers to make doughnuts. She used several sources for her recipes including Alton Brown, Nancy Silverton, Kate Neumann and Epicurious.

I have never deep fried anything in my life!!!  this last summer I went to the Minnesota State Fair for the first time where I'm pretty sure anything you could ever dream of deep frying can be found and tasted.  I am personally not a fan of deep frying but I'd be lying if I said I haven't thought about making doughnuts for a very long time.
Given that I am a novice at deep frying and that I was only going to feed Nate and my lab I decided I would only make one kind of doughnut and then, depending on how it went try another recipe sometime later.

I settled on the yeast doughnut recipe courtesy of Alton Brown.

Truth be told, doughnuts are pretty easy to make and pretty darn delicious.  Aside from the stickiness of the doughnut making them slightly difficult to handle, everything was cake!  The doughnuts turned out perfect--light, airy and although I was originally worried about the amount of nutmeg the recipe called for it added a nice nutty richness that balanced the sweetness from the icing and cinnamon-sugar that I used as toppings.

Yeast Doughnuts:

Ingredients:
1½ cup Milk
1/3 cup Vegetable Shortening 
4.5 tsp Active Dry Yeast
1/3 cup Warm Water (95°F to 105°F )
2 Eggs, Large, beaten 
 ¼ cup White Granulated Sugar
1.5 tsp Salt
1 tsp Nutmeg, grated
4 2/3 cup All Purpose Flour
Canola Oil – you want 3 inches of oil (can substitute any flavorless oil used for frying)

1) Place the milk in a medium saucepan and heat over medium heat just until warm enough to melt the shortening. (Make sure the shortening is melted so that it incorporates well into the batter.)
 2) Place the shortening in a bowl and pour warmed milk over. Set aside.
3) In a small bowl, sprinkle the yeast over the warm water and let dissolve for 5 minutes. It should get foamy. After 5 minutes, pour the yeast mixture into the large bowl of a stand mixer and add the milk and shortening mixture, first making sure the milk and shortening mixture has cooled to lukewarm.
4) Add the eggs, sugar, salt, nutmeg, and half of the flour. Using the paddle attachment of your mixer (if you have one), combine the ingredients on low speed until flour is incorporated and then turn the speed up to medium and beat until well combined.
5) Add the remaining flour, combining on low speed at first, and then increase the speed to medium and beat well.
6) Change to the dough hook attachment of the mixer and beat on medium speed until the dough pulls away from the bowl and becomes smooth, approximately 3 to 4 minutes (for me this only took about two minutes). If you do not have a dough hook/stand mixer – knead until the dough is smooth and not sticky.


7) Transfer to a well-oiled bowl, cover, and let rise for 1 hour or until doubled in size.
8) On a well-floured surface, roll out dough to 3/8-inch (9 mm)thick. (Make sure the surface really is well-floured otherwise your doughnuts will stick to the counter).
9) Cut out dough using a 2 1/2-inch (65 mm) doughnut cutter or pastry ring or drinking glass and using a 7/8-inch (22 mm) ring for the center whole. Set on floured baking sheet, cover lightly with a tea towel, and let rise for 30 minutes.


10) Preheat the oil in a deep fryer or Dutch oven to 365 °F.


11) Gently place the doughnuts into the oil, 3 to 4 at a time. Cook for 1 minute per side or until golden brown (my doughnuts only took about 30 seconds on each side at this temperature).

12) Transfer to a cooling rack placed in baking pan. Allow to cool for 15 to 20 minutes prior to glazing, if desired.


Vanilla Glaze:

Ingredients: 
1/4 cup Whole Milk (I used enough to make it smooth)
1 tsp Vanilla Extract
2 cups Confectioners' Sugar


1) Combine milk and vanilla in a medium saucepan and heat over low heat until warm. 
2) Sift confectioners' sugar into milk mixture. Whisk slowly, until well combined. 
3) Remove the glaze from the heat and set over a bowl of warm water. 
4) Dip doughnuts into the glaze, 1 at a time, and set on a draining rack.


Cinnamon-Sugar Coating:

Ingredients:  
1/2 cup Sugar
1 1/4 tsp Ground Cinnamon

1) Combine both in a bowl and toss doughnuts in mixture to coat.


Enjoy!

Wednesday, September 29, 2010

September Daring Bakers Challenge: Get Creative!


The September 2010 Daring Bakers’ challenge was hosted by Mandy of “What the Fruitcake?!” Mandy challenged everyone to make Decorated Sugar Cookies based on recipes from Peggy Porschen and The Joy of Baking.

I was really excited for this month's challenge.  First because I love sugar cookies (who doesn't) and second the challenge was to decorate the cookies in a way that reflects what September means to us.  September is Nate's and my anniversary (this year is the 3rd) so, needless to say, September is a very special month.  I decided to decorate the cookies accordingly--hearts and all.

The only modification I made to the cookies was the addition of almond extract in addition to the vanilla extract.


The quintessential sugar cookie for me will always be the recipe from the Betty Crocker cookbook which uses almond extract and while it may not be the most sophisticated sugar cookie, it is delicious and reminds me of baking with my mom for the holidays when I was little.

I do have to say that these cookies were good but I think they were much more like a shortbread (due to the absence of a chemical leavener in the recipe) which is a little disappointing when you're expecting a sugar cookie.  These were more dense and not so chewy--2 things I love about sugar cookies.  They were however much easier to roll and cut than sugar cookies normally and in the end made a delicious treat :)


Basic Sugar Cookies

Ingredients:
½ cup + 6 Tbsp Unsalted Butter, at room temperature
3 cups + 3 Tbsp All Purpose / Plain Flour
1 cup Caster Sugar (Superfine Sugar)
1 Large Egg, lightly beaten
1 tsp Vanilla Extract
½ tsp Almond Extract

1) Preheat oven to 350°F
2) Cream together the butter, sugar and extracts. Beat until just becoming creamy in texture.
3) Beat in the egg until well combined, make sure to scrape down the sides of the bowl.


4) Add the sifted flour and mix on low until a non sticky dough forms.
5) Knead into a ball and divide into 2 or 3 pieces.


6) Roll out each portion between parchment paper to a thickness of about 5mm/1/5 inch (0.2 inch)


7) Refrigerate for a minimum of 30mins.
8) Once chilled, peel off parchment and place dough on a lightly floured surface.
9) Cut out shapes with cookie cutters or a sharp knife.
10) Arrange shapes on parchment lined baking sheets and refrigerate for another 30mins to an hour.


11) Re-roll scraps and follow the above process until all scraps are used up.
12) Bake until golden around the edges, about 8-15mins depending on the size of the cookies.
13) Leave to cool on cooling racks.
14) Once completely cooled, decorate as desired.

Royal Icing

Ingredients: 
3 cups Confectioner’s Sugar, unsifted
2 Large Egg Whites
2 tsp Lemon Juice
1 tsp Almond Extract


1) Beat egg whites with lemon juice until combined.
2) Sift the icing sugar to remove lumps and add it to the egg whites.
3) Beat on low until combined and smooth.
4) Use immediately or keep in an airtight container.


I think these cookies tasted best immediately after the icing dries.  The only thing that made September better than my anniversary and the cookies to celebrate it was the morning after I baked them Nate asked me to marry him over waffles!!!!!  Best month ever!!!

Tuesday, September 7, 2010

August Daring Bakers Challenge: Nutty and toasty meets cool and creamy...


The August 2010 Daring Bakers’ challenge was hosted by Elissa of 17 and Baking. For the first time, The Daring Bakers partnered with Sugar High Fridays for a co-event and Elissa was the gracious hostess of both. Using the theme of beurre noisette, or browned butter, Elissa chose to challenge Daring Bakers to make a pound cake to be used in either a Baked Alaska or in Ice Cream Petit Fours. The sources for Elissa’s challenge were Gourmet magazine and David Lebovitz’s “The Perfect Scoop”.

I was a little hesitant about the August challenge; A few months ago we attended our friends Melanie and John's wedding where one of the favors were these amazing petit fours.  When we returned to Boston I tried to make theses cute little celebration cakes and it ended in DISASTER!  The trouble was the fondant--more specifically making and dipping the cakes in the fondant.  I vowed never to make them again but I really hate being bad at things so when I saw the choice between Baked Alaska and Petit Fours I couldn't resist the challenge again and I'm glad I didn't :)

I decided to stick with the browned butter pound cake and the chocolate glaze for the Petit Fours but for the ice cream I decided to mix it up and make pistachio ice cream, an absolute favorite of mine.  I started the project by making the ice cream with a recipe from Bon Appetit which was simple and delicious and top them with gold dusted pistachio halves to give them a slightly classy look!   These cakes took a bit of time to make and assemble but the brown butter pound cake was amazing enough on its own but when combined with the creamy subtleness of pistachio ice cream is was over the top tasty.

Pistachio Ice Cream

 
Ingredients:

1 cup unsalted shelled pistachios
3/4 cup sugar
2 cups milk (do not use low-fat or nonfat)
1/2 teaspoon almond extract

4 large egg yolks
1 cup whipping cream
3/4 cup unsalted shelled pistachios, toasted, coarsely chopped
Finely grind 1 cup pistachios and 1/4 cup sugar in processor. 

 
Bring milk and ground pistachio mixture to boil in heavy large saucepan. Remove from heat. Mix in almond extract.
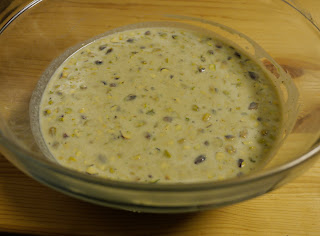
Whisk egg yolks and remaining 1/2 cup sugar in medium bowl. Gradually whisk in hot milk mixture. Return custard to saucepan. Cook over low heat until custard thickens and leaves path on back of spoon when finger is drawn across, stirring constantly, about 10 minutes (do not boil). Strain into large bowl. Chill until cold, about 2 hours. 


Stir 1 cup whipping cream and chopped pistachios into custard. Process mixture in ice cream maker according to manufacturer's instructions. Transfer to container and freeze. (Ice cream can be prepared 3 days ahead.) 


Brown Butter Pound Cake

Ingredients:

19 tablespoons unsalted (sweet) butter
2 cups sifted cake flour (not self-rising; sift before measuring)
1 tsp baking powder
1/2 tsp salt
1/2 cup packed light brown sugar
1/3 cup granulated sugar
4 large eggs
1/2 tsp pure vanilla extract

Preheat the oven to 325°F/160°C and put a rack in the center. Butter and flour a 9”x9” (23cmx23cm) square pan.
Place the butter in a 10” (25cm) skillet over medium heat. Brown the butter until the milk solids are a dark chocolate brown and the butter smells nutty. (Don’t take your eyes off the butter in case it burns.) Pour into a shallow bowl and chill in the freezer until just congealed, 15-30 minutes.
Whisk together cake flour, baking powder, and salt.
Beat the brown butter, light brown sugar, and granulated sugar in an electric mixer until light and fluffy, about 2 minutes. Beat in the eggs one at a time, mixing well, and then the vanilla extract.
Stir in the flour mixture at low speed until just combined.
Scrape the batter into the greased and floured 9”x9” (23cmx23cm) square pan. Smooth the top with a rubber spatula and rap the pan on the counter. Bake until golden brown on top and when a toothpick inserted into the center comes out clean, about 25 minutes.
Cool in the pan 10 minutes. Run a knife along the edge and invert right-side-up onto a cooling rack to cool completely.


Chocolate Glaze 

Ingredients:

9 oz dark chocolate, finely chopped
1 cup heavy cream
1 1/2 tbsp light corn syrup, Golden syrup, or agave nectar
2 tsp vanilla extract

Stir the heavy cream and light corn syrup in a small saucepan over medium heat until it comes to a boil. Remove from heat and add the dark chocolate. Let sit 30 seconds, then stir to completely melt the chocolate. Stir in the vanilla and let cool until tepid before glazing the petit fours.


Assembly Instructions 

1. Line a 9”x9” (23cmx23cm) pan with plastic wrap, so that no sides of the pan are exposed and so there is some extra plastic wrap hanging off the sides. Spread 1 ¾ to 2 cups (450ml to 500ml) ice cream into the pan. Cover with more plastic wrap and freeze several hours.
2. Once the brown butter pound cake has completely cooled, level the top with a cake leveler or a serrated knife. Then split the cake in half horizontally to form two thin layers.
3. Unwrap the frozen ice cream. Flip out onto one of the layers of cake and top with the second layer of cake. Wrap well in plastic wrap and return to the freezer overnight.
4. Brush remaining pistachio halves with gold dust. 


5. Make the chocolate glaze (see above.)
6. While the glaze cools, trim ¾” (2cm) off each side of the ice cream cake to leave a perfectly square 7.5” (19cm) ice cream cake. Cut the cake into twenty five petit fours, each 1.5”x1.5” (4cmx4cm).
7. Glaze the petit fours one at a time: place a petit four on a fork and spoon chocolate glaze over it and top with one gold dusted pistachio half.
8. Place the petit fours on a parchment-lined baking sheet and return to the freezer for one hour.


Wednesday, August 11, 2010

Chicken Massaman Curry

I don't know about you but I love Thai curries one of my favorite flavors being massaman.  I've tried many, many times to construct curry pastes from scratch and have never been able to recreate the rich full flavors that curries from restaurants seem to have.  Well, last week when we decided to try again I decided to try a store bought paste, partially due to a lazy lazy funk I was in and also just a general curiosity..could it be good or, could it be better than anything I've attempted?  The answer--yes, to both!
The only brand I could find was Maesri's Massaman Curry Paste which made choosing a brand pretty easy :)


As far as recipes to follow I started with a recipe I found on the foodblog The Very Hungry Cook and then modified it to fit what I had in terms of spices and in terms of what I wanted in the curry.
The first thing to do is slice the chicken and mix with some oil and the curry paste and set that aside to marinate while you prepare all the veggies and other components.


Next I prepped all of the other ingredients so once I started cooking I could crank through the recipe.  I used onions, potatoes, butternut squash, tomatoes, and peppers.


 The recipe called for star anise, cardamom and a few cinnamon sticks, I didn't have any star anise on hand so I substituted with chinese five spice and it worked wonderfully.  The spices are heated in some oil until fragrant (~30sec) and then add the onions and cook until translucent and a little browned on the edges.


Add the chicken and cook until it's white on all sides.


Then add coconut milk, fish sauce and water allow to mix and follow that with the potatoes, squash, half the cilantro and peanuts.  Bring it to a boil and then simmer for 15-20min.  All that's left after that is to add some sugar, peanut butter, tamarind, tomatoes, peppers and cilantro; cook for another 5-10min and it's good to go!
We served it over rice and topped it with chopped peanuts and cilantro--delicious!


Chicken Massaman Curry:
Ingredients:
1lb. boneless skinless chicken breast                                   
3 tbsp. massaman curry paste                  
8 cardamom pods                                         
2 sticks cinnamon                                           
3 star anise                                         
1 large onion (sliced)                                                 
2 cans coconut milk                                      
1 cup water                                                
1.5 tbsp fish sauce                                              
2 medium potatoes (peeled, quartered)
1/2 lb. butternut squash (peeled, cubed)
1 pint cherry tomatoes (halved)
1 red bell pepper sliced
1/2 tbsp tamarind paste                                   
1 tbsp brown sugar
2 tbsp peanut butter                                      
3-4 tbsp peanuts (roasted, unsalted) + more for topping                                                
2 tbsp peanut/vegetable oil                         
Thai basil leaves a handful, chopped.
                              
1) Cut the chicken into bite sized pieces.
2) Add 1 tbsp of the oil and the massaman curry paste to the chicken. Mix well, and set aside to marinate.
3) Heat the remaining oil in a pan.  Once the oil is hot, fry the cinnamon, cardamom and star anise in it for 30 seconds (I used chinese five spice).
4) Add the onions and fry until golden-brown.
5) Then add the chicken, lower the flame and let it cook for 3-5 minutes.
6) Add coconut milk, fish sauce, water, potatoes, butternut squash, peanuts, half the basil and bring the mixture to a boil.
7) Cover and simmer for ~20 minutes or until the potatoes and squash are cooked through.
    *If needed, remove the lid and cook until the curry reaches desired thickness.
8) Stir in the tamarind paste, brown sugar, tomatoes, peppers, peanut butter and remaining basil.  Cook for 5-10 minutes longer.
9) Remove from heat and serve hot with jasmine rice, top with remaining basil and chopped peanuts.
 

Tuesday, July 27, 2010

July Daring Bakers Challenge - Swiss Swirl Ice Cream Cake


The July 2010 Daring Bakers’ challenge was hosted by Sunita of Sunita’s world – life and food. Sunita challenged everyone to make an ice-cream filled Swiss roll that’s then used to make a bombe with hot fudge. Her recipe is based on an ice cream cake recipe from Taste of Home.

I am ashamed to admit that it's almost August and I have yet to make 1 quart of ice cream!  Naturally when I saw that the Daring Bakers' challenge required that I make 2 ice creams I was jumping for joy!  Although there are a lot of individual components that go into this ice cream cake it really is sooo easy.  I found the most challenging thing to be the chilling times.  I love to start things when I get home from work which inevitably forces me to wake up at 2am to do something in the kitchen--I swear I will never learn.  This being my 1st challenge I had the newbie fear of straying to far from the original recipe so the only things I switched up were the ice creams.  I (and of course Nate) love, love, love butterscotch, seriously!  So butterscotch was one ice cream and I decided that rather than do chocolate, vanilla would balance out the richness from the butterscotch (man was it rich) plus Philadelphia style vanilla ice cream is the easiest thing to make--EVER!  All in all this was a really fun challenge, perfect for the hot New England summer :)

Swiss roll ice cream cake (inspired by the recipe of the same name from the Taste of Home website)

The Swiss Rolls-
Ingredients:
6 eggs
1 cup sugar + extra for rolling
6 tbsp all purpose flour 
5 tbsp unsweetened cocoa powder, sifted together with flour
2 tbsp boiling water
Oil for brushing the pans

1. Preheat the oven to 400 deg F approximately. Brush the baking pans (11 x 9 inches) with a little oil and line with greaseproof baking paper.
2. In a large mixing bowl, add the eggs and sugar and beat till very thick; when the beaters are lifted, it should leave a trail on the surface for at least 10 seconds.


3.  Add the flour mixture, in three batches and fold in gently with a spatula. Fold in the water.


4. Divide the mixture among the two baking pans and spread it out evenly, into the corners of the pans.
5. Place a pan in the centre of the pre heated oven and bake for about 10-12 minutes or till the center is springy to the touch.


6.  Spread a kitchen towel on the counter and sprinkle a little caster sugar over it.
7.  Turn the cake on to the towel and peel away the baking paper. Trim any crisp edges.
8.  Starting from one of the shorter sides, start to make a roll with the towel going inside. Cool the wrapped roll on a rack, seam side down.
9.  Repeat the same for the next cake as well.

Whipped Filling-
Ingredients:
2 cups whipping cream
1 tsp vanilla extract
5 tbsp sugar

1. In a large bowl, add the cream, sugar and vanilla and beat until very thick.
2. Divide the cream mixture between the completely cooled cakes.
3. Open the rolls and spread the cream mixture, making sure it does not go right to the edges (a border of ½ an inch should be fine). Roll the cakes up again, this time without the towel. Wrap in plastic wrap and chill in the fridge until needed, seam side down.

Hot Fudge sauce-
Ingredients:
1 cup sugar
3 tbsp unsweetened cocoa powder
2 tbsp cornstarch
1½ cups water
1 tbsp butter
1 tsp vanilla extract
1. In a small saucepan, whisk together the sugar, cocoa powder, cornstarch and water.
2. Place the pan over heat, and stir constantly, till it begins to thicken and is smooth (for about 2 minutes).
3. Remove from heat and mix in the butter and vanilla. Keep aside to cool.  
Butterscotch Ice Cream-
Ingredients:
1 cup firmly packed brown sugar
2 tbsp butter
1 tbsp vanilla
2 tsp bourbon (optional)
1 1/2 cups whipping cream
2 cups half-and-half
6 large egg yolks

1. In a 1- to 2-quart pan over medium heat, stir brown sugar and butter until butter is melted, sugar is dissolved, and mixture is bubbly, 3 to 4 minutes. Whisk in 1/2 cup whipping cream until smooth; remove butterscotch mixture from heat. Add vanilla and bourbon, if using.
2. In a 3- to 4-quart pan over medium-high heat, combine remaining 1 cup whipping cream and the half-and-half; bring to a simmer.
3. Meanwhile, in a bowl, beat egg yolks to blend. Whisk 1/2 cup of the warm cream mixture into egg yolks, then pour egg yolk mixture into pan with cream. Stir constantly over low heat just until mixture is slightly thickened, 2 to 4 minutes. Immediately remove from heat.
4. Pour through a fine strainer into a clean bowl and whisk in butterscotch mixture. Chill until cold, stirring occasionally, about 2 hours; or cover and chill up to 1 day.


5. Freeze mixture in an ice cream maker according to manufacturer’s instructions. Serve softly frozen, or transfer ice cream to an airtight container and freeze until firm, at least 6 hours or up to 1 week.


Philadelphia-Style Vanilla Ice Cream-
Ingredients:
2 cups heavy cream
1 cup half and half
3/4 cup sugar
1 tablespoon vanilla extract

1. In a bowl, stir together the cream and half and half. Add the sugar and whisk until the sugar is dissolved, 3 to 4 minutes. Test for graininess by tasting a small amount of the liquid; it should feel smooth on the tongue and there should be no sugar visible on the bottom of the bowl when it is stirred or spooned out. Continue whisking, if necessary, to ensure that the texture of the finished ice cream will be smooth. Stir in the vanilla.
2. Cover the cream mixture with plastic wrap and refrigerate for at least 3 hours or up to 24 hours.
3. Prepare an ice cream maker with at least a 1-quart capacity according to the manufacturer’s instructions.

Assembling the Cake-

1. Cut the Swiss rolls into 20 equal slices ( approximately 2 cms each).

2. Cover the bottom and sides of the bowl in which you are going to set the dessert with saran wrap.
3. Arrange the slices at the bottom of the bowl, with their seam sides facing each other and continue to arrange them to cover the sides of the bowl. Cover the bowl with plastic wrap and freeze until the slices are firm (at least 30 minutes).


4. Soften the butterscotch ice cream. Take the bowl out of the freezer, remove the saran wrap and add
the ice cream on top of the cake slices. Spread it out to cover the bottom and sides of the bowl. Cove
the bowl with plastic wrap and freeze until firm ( at least 1 hour).


5. Add the fudge sauce over the vanilla ice cream, cover and freeze until firm (at least an hour).


6. Soften the vanilla ice cream and spread it over the fudge sauce. Cover with plastic wrap and freeze for at least 4-5 hours until completely set.


7. Remove the plastic cover, and place the serving plate on top of the bowl. Turn it upside down and remove the bowl and the saran wrap. If the bowl does not come away easily, wipe the outsides of the bowl with a kitchen towel dampened with hot water.


8. Slice, serve and enjoy :)